giovedì 31 maggio 2018

"HAPPY UNDER THE SEA BIRTHDAY" EASEL CARD


Buongiorno e ben ritrovati!!!
Come state?! Io continuo ad essere sempre di frettissima e non vedo l'ora di scappare al mare per staccare la spina per un cicinin .
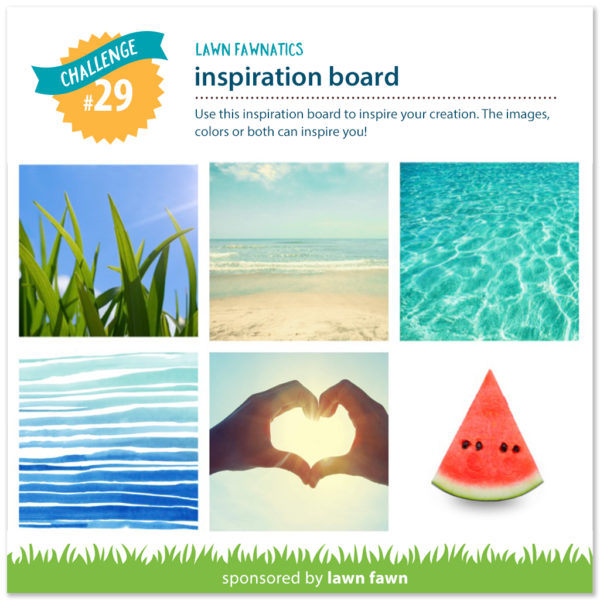
Sono comunque riuscita a trovare il tempo per giocare con il challenge #29 sul blog di Lawn Fawnatics. Questa volta bisognava cimentarsi con una Inspiration Board dedicata al mare e all'estate e io ho deciso di realizzare una easel card con il carinissimo set di timbri "You are sublime".

Hello! How are you?
I'm always in a hurry in this last months, anyway today I'm here to show you the card I made for the challenge #29 over the Lawn Fawnatics blog.
This month was the time of a summery fun Inspiration Board to play with and I decided to make an easel card with the super cute "You are sublime" stamp set.

Prima di tutto ho tagliato diversi rettangoli da del cartoncino bianco. Il primo, che è quello per la base della card, misura 11"x 4 1/2" e vi ho fatto due pieghe (come si vede nella foto), una a 5 1/2" e l'altra a 2 3/4".

First of all I cut 4 different rectangles. The first one (our card base) is 11"x 4 1/2" and I scored it at 5 1/2" and at 2 3/4" (as you can see in the picture below).


Poi ho tagliato due rettangoli per realizzare il mare e due più piccoli per fare il fondale. Per ottenere l'effetto del mare mi sono servita di due fustelline a forma di onde, mentre per il fondale ho usato quelle per ottenere delle collinette.

Then I die cut the sea rectangles with a waves border die and the sand rectangles with a hillside border die.


Ho colorato il tutto con i Distress Oxide e i Distress Ink e ho aggiunto qualche tocco di Nuvo mousse.

I colored everything with some Distress Ink, some Distress Oxide and a Nuvo mousse touch.


Ho infine timbrato e colorato con gli Spectrum Noir i protagonisti del set di Lawn Fawn e ho completato la card.

I colored all the Lawn Fawn stamp set subjects with some Spectrum Noir and I added them to the card.


Alcuni dettagli.

Some close up.


Bene, anche per oggi è tutto. Grazie mille per essere passati a trovarmi e alla prossima. Un abbraccio, Silvia.

Well, that's all for today. Thank you so much for your visit. Hugs, Silvia.

With this post I also play over the Simon Says Stamp Wednesday Challenge Blog.


giovedì 24 maggio 2018

"SEGUI IL SENTIERO DORATO"


Buongiorno a tutti!!!
Eccomi di nuovo qui per condividere con voi una nuova card.
Questa volta ho deciso di mixare due delle cose che più amo in questi giorni: le fustelle fold-a-long card di Sizzix e i timbri ispirati al Mago di Oz di Impronte d'Autore (semplicemente A-D-O-R-A-B-I-L-I ) e che dire....mi piace molto l'effetto finale. Inoltre, il biglietto interno può diventare un allegro segnalibro!


Per colorarne la base, ho utilizzato del Distress Ink nei colori Festive Berries e Candied Apple e il timbro "Gingham backdrops" di Lawn Fawn, che ho usato anche sulla fascetta blu che chiude la card.


Hello to Everybody!!!
I'm here again to share with you my latest card. This time I decided to mix two of my favorite crafty things of this days up: Sizzix fold-a-long die and the super cute Wizard of Oz stamp sets by Impronte d'Autore (they're soooooo A-D-O-R-A-B-L-E!!!). and what to say....I really love the final result. Then, the inside tag can become a happy bookmark! To color it I used some Festive Berries and Candied Apple Distress Ink and the "Gingham backdrops" stamp by Lawn Fawn.


Anche per oggi è tutto, ma Privacy Policy permettendo (non ci capisco nulla e non riesco a generare il banner....aiuto!!!!) ......a presto!!!! Silvia.

It's all for me now, see you soon (Privacy Policy permitting!). Silvia.

venerdì 18 maggio 2018

SOGNANDO L'ESTATE....DREAMING OF A SUNNY SUMMER

Caspiterina, ancora non mi sembra vero!!! Due giorni consecutivi di sole e temperature miti...non diciamolo a voce troppo alta però, non si sa mai!
Questo sole mi ha fatto venire una gran voglia d'estate e di mare. Sarà che è stato un anno davvero impegnativo e lungo e difficile, che ho prorpio bisogno di staccare un attimo la spina e farlo sdraiati sulla spiaggia, cullati dallo sciabordio delle onde....bhè, non sarebbe male! ed è proprio da qui, complici anche le dolcissime "hula girls" di Clearly Besotted, che è nata questa card, con cui partecipo al Simon Says Stamp Monday Challenge e al Simon Says stamp Wednesday Callenge di questa settimana.

Wow...two consecutive sunny day....I can hardly believe it!!! And this warm sun makes me want to lay on a golden beach with the sound of the waves....and dreaming of it I created this card, with the super cute d"hula girls" by Clearly Besotted.


Per realizzarla, sono partita con il tagliare, da del cartoncino bianco, due rettangoli 4 1/8"x 10 3/4" e li ho piegati a metà.

I started by cutting 2 rectangles ( 4 1/8" x 10 3/4") from some white cardstock and folding them in a half.

Ho poi colorato il pannello frontale sfumando prima del Distress Ink color tumbled glass e poi aggiungendo una texture grazie ad uno stencil della Reverse Confetti e un po' di Nuvo Mousse e l'ho lasciato asciugare. Una volta pronto vi ho tagliato una finestra a forma di cuore (servendomi di una fustella di Lawn Fawn) e l'ho decorata con due fiori di ibisco (che ho fustellato con una fustella della Newton's Nook) e una scritta "Aloha" (anch'essa ottenuta con una fustella di Lawn Fawn), che ho poi embossato a caldo con della polvere trasparente.

I blended the front pannel with some tumbled glass Distress Ink and then I added some texture with a Reverse Confetti stencil and some Nuvo Mousse and I let it dry.
Then I cut a heart shaped window (with a Lawn Fawn die) and I decorated it with two hibiscus flowers (that I die cut with a Newton's Nook die) and an "Aloha" script (die cut with a Lawn Fawn die), that I embossed with a clear powder.


Per realizzare il mare del pannello interno della card ho sfumato un pezzo di cartoncino bianco con tre diverse sfumature d'azzurro dei  Distress Ink  e ho poi cercato di aggiungere l'effetto del movimento dell'acqua con uno stencil della Neat & Tangled, del Distress Ink color stormy clouds e della Nuvo Mousse. Infine ho usato la fustella "Waves border trio" di Mama Elephant per tagliare due strisce diverse che ho usato per costruire il mare.
Per realizzare il cielo e la spiaggia ho invece sfumato del Distress Ink e del Distress Oxide direttamente sul secondo pannello 8( quello su cui andrò a costruire la mia scena).

For the inside of the card, I first colored a piece of white cardstock with 3 different Distress Ink and then I tried to recreate the waves effect with a Neat & Tangled stencil, some stormy clouds Distress Ink and some Nuvo Mousse. Then I used the Mama Elephant "Waves border trio" to cut two different "stripes" that I used to built my sea.
For the sky and the beach I inked directly on the second pannel and I used some Distress Ink and Oxide to color them.


Per finire, ho timbrato e colorato con gli Spectrum Noir una delle dolcissime hula girl del set "Happy Hula" di Clearly Besotted, l'ho tagliata servendomi delle fustelle coordinate e ho finito di costruire la scena che avevo pianificato.

And to finish, I stamped and colored (with Spectrum Noir) one of the hula girl from the Clearly Besotted "Happy Hula" stamps set, I cut it out with the coordinating dies and I built up the scene I planned.


Avete visto quanto sono carucce quelle piccole pailettes a forma di conchiglia di Lucy Abrams?! Io me ne sono perdutamente innamorata....credo che saranno presenti in un sacco di miei progetti estivi!!!!

Have you seen how cute are the little shell sequins by Lucy Abrams?! I'm really in love with them...I think they're a must have for next Summer projects!


Ed ecco il terzo pannello della card.

And here you can see the third pannel of this card.


Che dire...anche per oggi è tutto. Grazie mille per essere passati di qui....spero di avervi fatto venire voglia di sperimentare questo tipo di card, perchè credo meriti almeno un tentativo. Silvia

Well....that's all for today. Thank you so much for stopping by and I hope you'll give a try to this kind of card. Bye, Silvia.

lunedì 14 maggio 2018

FOLD-A-LONG CARD DIES....MAI PIU' SENZA!!!

Ciaoooo!!!
Come vi ho già detto, qualche tempo fa ho scoperto le fustelle Fold-a-Long disegnate da Jen Long per Sizzix e adesso non ne posso più fare a meno!!!
Così oggi vorrei mostrarvi due card che ho realizzato con la fustella "Jar Fold-a-Long card". Si, avete capito bene, due card differenti nel "genere" perché potete usare queste fustelle nel modo classico, oppure utilizzarle per creare delle graziosissime shaped cards.
 Interessante, non trovate?!

Hello!!!
As I've already told you, some time ago  I discovered the Sizzix Fold-a-Long dies designed by Jen Long and now I can't live without!!!
So today I'm here to share with you two cards I made with the "Jar Fold-a-Long card" die. Yes, two different cards 'cause you can use this die to make some fold-a-long card or some very cute shaped cards.
Interesting, isn't it?!


Ecco allora la prima card che ho realizzato, che è nella versione "classica". Per realizzarla ho utilizzato delle carte della collezione "Spring Things" della Doodlebug Design e le dolcissime lucciole di Lawn Fawn (con un piccolo tocco di "glow in the dark"). Inoltre, come forse vi ho già detto, io amo la primavera e così non potevo restare impassibile davanti al timbro "April Shower" dei Newton's Nook.

Well, the first card is the "classical one". I used some Doodlebug design papers from the "Spring Things" collection and the super cute fireflies by Lawn Fawn ( with some "glow in the dark" touch. Then, as you may know, I love Spring really a lot, so I couldn't fall in love with Newton's Nook "April Shower" stamp!


La seconda card è una shaker card a forma di barattolo. Per realizzarla ho utilizzato il carinissimo timbro "Pucker up" di Sugar Pea Designs, delle carte della Doodlebug Design e delle paillettes di Lucy Abrams...non è adorabile?!

The second one is a mason jar shaped shaker card. To make it I used the sweet "Pucker up" stamp set by Sugar Pea Design, Doodlebug Design papers and some Lucy Abrams sequins....adorable, isn't it?!


Che dire...io mi sono divertita veramente molto nel realizzare queste card e spero di avervi fatto venire voglia di sperimentarle. Grazie mille per essere passati a curiosare anche quest'oggi e ci si vede al prossimo post. Un abbraccio, Silvia.

I really had so much fun creating this two cards and I hope you liked this idea too. See you on the nest post. Big hugs, Silvia. 


giovedì 10 maggio 2018

TIC-TAC, TIC-TAC,TIC-TAC....ALICE IN WONDERLAND CARD


Buongiorno a tutti!!!
Eccomi con un brevissimo post sulla nuova card realizzata con i fantastici timbri di Impronte d'Autore dedicati ad "Alice nel Paese delle Meraviglie".

Hello to everyone!!!
Today I'm here with a very short post on my latest "Alice in Wonderland" card, made with the super cute Impronte d'Autore stamps.


Sono partita da un ciondolo in fimo che avevo realizzato tempo addietro, dove la base era rappresentata da un grande orologio, e ho deciso che sarebbe stato carino riprendere questa idea in una card.

I started from a polymer clay necklace I made a lot of time ago, where there was a big clock, and I decided to put this idea in a card.


Per realizzare questa card ho anche usato alcune fustelle Sizzix, "stravolgendole" un po'.
Ad esempio, per realizzare l'orologio ho usato la fustella "Embroidery Hoop" per il corpo, la fustella "Festival" per fare le lancette e infine la fustella "Delicate Letters #2" per le ore.....che ne dite? Carina, no?!

Making this card, I also used some Sizzix dies. For example, to make the clock I used the "Embroidery Hoop" die for the body of my clock, the "Festival" die for the clock hands and the "Delicate Letters #2" for the hours...what do you think about it? It's pretty, isn't it?!


Ora scappo, ma ho già pronte nuove cards da raccontarvi per cui....a prestissimoooooo!!!! Silvia.
I have to leave now, but I've a lot of new cards and ideas to talk about so......stay tune and see ya soon!! Silvia.